

JasperReports JDBC Datasource Tutorial. This tutorial is a continuation of Insider's Guide: Java Swing JDBC CRUD Example with Jasper Reports (with pictures) tutorial.
We will now add JasperReports to our project. By the time that you are
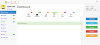
done with this tutorial, you will have the following report in your
project.


Getting Started
Download the JasperReports plugin for NetBeans IDE using the link below NetBeans IDE iReport Plugin Download Install the plugin and it will be integrated into NetBeans IDE. Adding JasperReports jar files to a NetBeans IDE Java Project Right click on Libraries node Select add Jar/Folder option Browse to the libs folder of the iReport directory. Add the following jar files- commons-beanutils-1.8.0.jar
- commons-collections-3.2.1.jar
- commons-digester-2.1.jar
- commons-logging-1.1.1.jar
- groovy-all-2.0.1.jar
- iText-2.1.7.js2.jar
- jasperreports-5.6.0.jar
- poi-3.7-20101029.jar
NetBeans IDE Creating JasperReports
Right click on employees package Select Report Wizard as shown in the image below

Note: if Report Wizard is not showed, select Other… option. You will get it from there You will get the following window

Choose Blank A4 Click on Next button

Enter rptEmployees.jrxml as the file name and extension Click on Next button

Click on New button to create a new data source

Click on Next Button

Click on Test button
Click on save button Enter the following query


SELECT * FROM employeesMake sure employees link is selected as shown in the image above Click on Next button

Click on Next button 

Click on Next button

Click on Finish button
Designing a JasperReport in NetBeans IDE
Double click on rptEmployees.jrxml to open the report designer Press Ctrl + Shift + 8 to open the Report palette Design the report as shown below
Note: Use the Report Inspector to add fields to the report Create a class JasperReports.java Add the following code
package employees;

import java.io.InputStream;
import java.sql.SQLException;
import java.util.HashMap;
import java.util.Map;
import net.sf.jasperreports.engine.JRException;
import net.sf.jasperreports.engine.JasperCompileManager;
import net.sf.jasperreports.engine.JasperFillManager;
import net.sf.jasperreports.engine.JasperPrint;
import net.sf.jasperreports.engine.JasperReport;
import net.sf.jasperreports.engine.design.JRDesignQuery;
import net.sf.jasperreports.engine.design.JasperDesign;
import net.sf.jasperreports.engine.xml.JRXmlLoader;
import net.sf.jasperreports.view.JasperViewer;

public class JasperReports {

    String m_where;
    String m_report_source = "/employees/";
    String m_sql_stmt;
    Map parametersMap = new HashMap();

    protected void showReport() {
        try {
            DBUtilities dbUtilities = new DBUtilities();
            InputStream is = getClass().getResourceAsStream(m_report_source);

            JRDesignQuery jrDesignQuery = new JRDesignQuery();
            jrDesignQuery.setText(m_sql_stmt);

            JasperDesign jasperDesign = JRXmlLoader.load(is);
            jasperDesign.setQuery(jrDesignQuery);

            JasperReport jasperReport = JasperCompileManager.compileReport(jasperDesign);
            JasperPrint jasperPrint = JasperFillManager.fillReport(jasperReport, parametersMap, dbUtilities.getConnection());
            JasperViewer.viewReport(jasperPrint, false);

        } catch (SQLException | JRException e) {
            System.out.println("Exception message " + e.getMessage());
        }
    }
}
HERE,- “showReport()” this method connects to the database dynamically to load data, specifies a report to be loaded, executes a JRDesignQuery query, compiles a JasperReport and displayes it
package employees;

public class DisplayReports extends JasperReports {

    public void showEmployees() {
        m_report_source = "rptEmployees.jrxml";
        m_sql_stmt = "SELECT * FROM employees ORDER BY employee_id";
        showReport();
    }
}
HERE,- “showEmployees()” this methods specifies the report to be loaded and the SELECT SQL statement to be executed by JRDesignQuery.
Testing the project
Run the project Click on Print All button You will get the following resultsComplete Project Source Code
Use the Link below to download the complete project source code


0 Commentaires